Product Introduction
Product Introduction
Installation
-
Product Assembly
1
Product Assembly
Bracket, cable assembly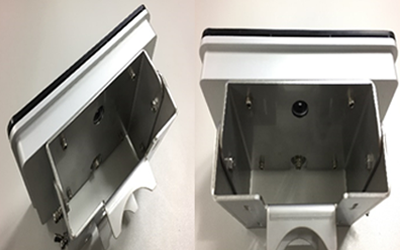
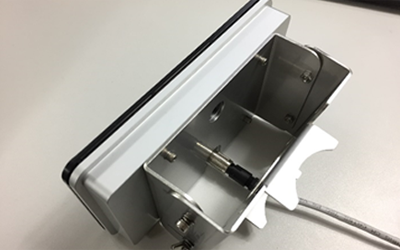
- Use the supplied screws to attach the product to the bracket as shown above. Make sure that the cable connection on the back of the product is connected to the arched hole on the bracket.
- Connect the connector end of the supplied cable to the cable connector on the back of the product. Insert the product connectors and connector's connecting end into the hole and turn them clockwise.
-
Product Installation
2
Product Installation
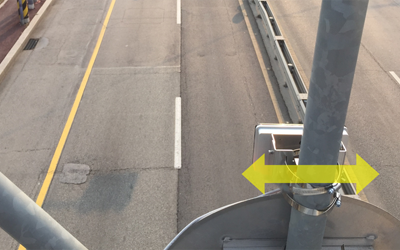
Tightly fasten to the installed location using an iron tie, and measure the height and angle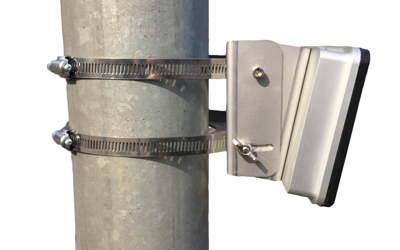
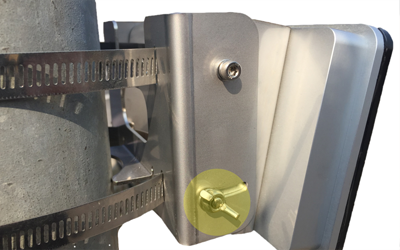
- Use an iron tie to attach the bracket to the column where the product will be installed, as shown above.
- Measure the height from the floor to where the product is installed and measure the tilt angle of the product.
- To tilt the product for proper positioning, adjust the angle of the product by loosening the screws located on both bottom sides of the bracket.
-
Product synchronization
3
Product synchronization
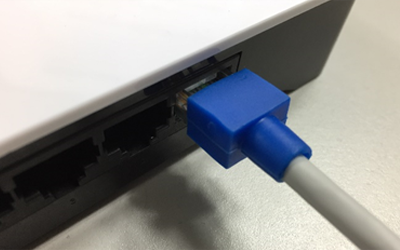
Power connection, network line connection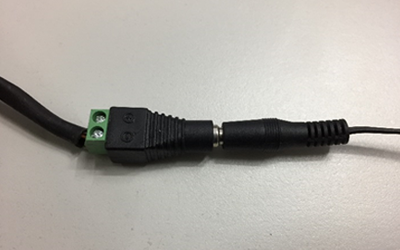
- Connect the power line of the cable to the adapter (12V).
- Connect the Ethernet line of the cable to the PC.
-
Software Settings
4
Software Settings
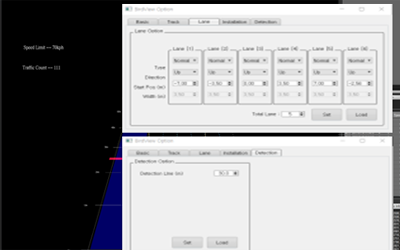
IP settings, program operation, line settings, detection line settings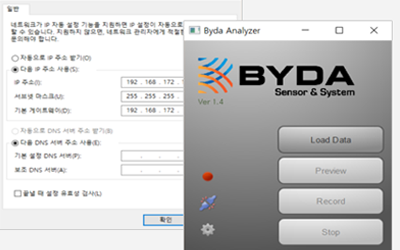
- Set the IP of the PC to be connected with the product by referring to the supplied manual. (IP address: 192.168.172.127, etc.)
- After powering up the product, run the BydaAnalyzer program and connect the product to the PC.
- With the operating program, set the per-lane position and vehicle detection points within the detection area.
-
Adjust the installation position
5
Adjust the installation position
Adjust the installation position based on track movement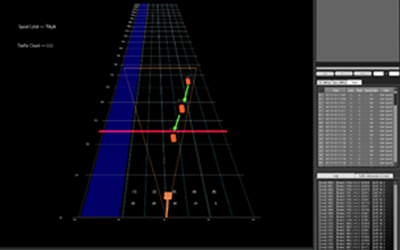
- Adjust the installation position of the product based on the movement of the track on the operating program screen. If the track is leaning from right to left instead of coming straight down, move the product to the right.
- Check whether the data in the right information window is output normally.